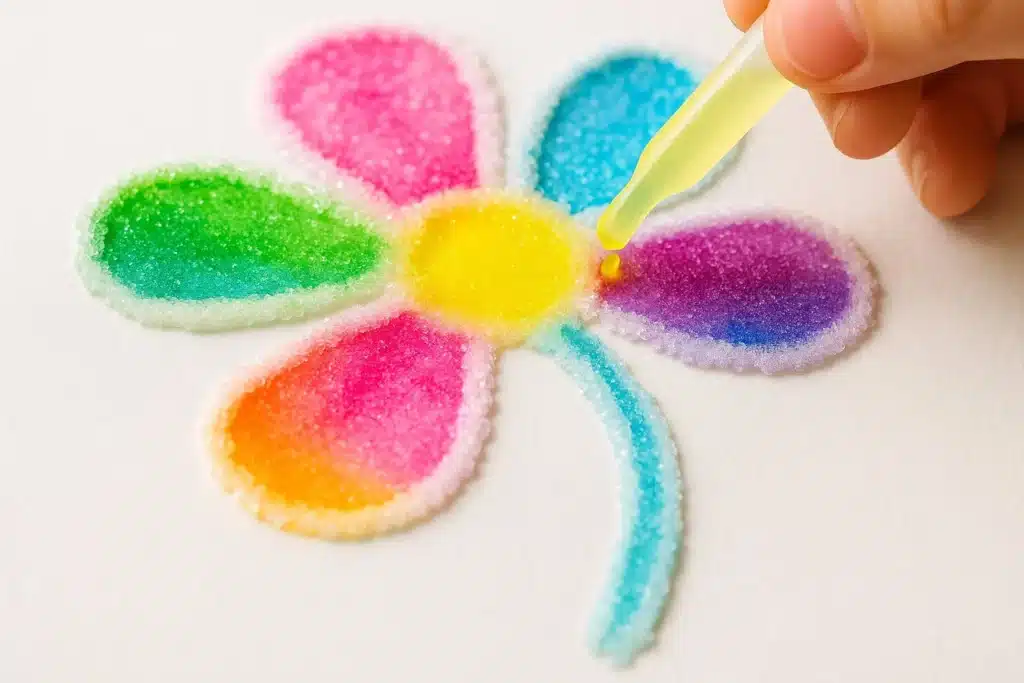
DIY Flowers Salt Painting is a captivating and colorful activity that brings together art and science in a delightful way. My kids had so much fun with this project on a rainy afternoon, and they couldn’t stop talking about the vibrant colors and the textured results. This hands-on activity allows children to express their creativity while engaging their senses, making it a perfect way to explore art and science simultaneously.

Why Make This Activity
Creating salt paintings is not only an enjoyable activity but also packed with educational benefits. It fosters creativity, promotes fine motor skills, and introduces basic STEM concepts such as absorption and color mixing. Whether for birthday parties, school projects, or just a fun day at home, DIY Flowers Salt Painting cuts down on screen time and encourages imaginative play among siblings and classmates. Children can collaborate to create their own masterpieces while boosting their interpersonal skills through shared creativity.
How to Make DIY Flowers Salt Painting
The process of DIY Flowers Salt Painting involves creating colorful flower designs using salt, watercolor, and glue. Children can visualize how colors blend and how salt interacts with the paint, creating stunning textured artwork. This activity requires adult supervision, especially during the mixing and cleanup processes.
Materials Needed:
- White school glue
- Table salt
- Watercolor paints (washable)
- A paintbrush (preferably a wide one)
- Thick paper or watercolor paper
- Plastic tray (for easier cleanup)
- A small bowl (for mixing)
- A spoon or stirring stick
- Optional: food coloring for added colors
Steps:
- Start by preparing your workspace. Cover the table with newspaper or a plastic tablecloth to manage messiness.
- Draw or outline your desired flower shapes on the thick paper with white school glue. Make sure to use enough glue to create a raised area for the salt to adhere to.
- While the glue is still wet, sprinkle the table salt generously over the glued areas. Ensure the flower shapes are well coated.
- Let the glue and salt sit for a few minutes to dry slightly while you prepare the watercolor.
- In a small bowl, mix water with watercolor paints. Each color should be vibrant and liquid enough to flow easily.
- Using the paintbrush, carefully drop the watercolor onto the salt-coated areas. Watch how the paint travels through the salt and creates beautiful effects. Encourage children to experiment with color blending.
- Allow the artwork to dry completely, which may take a few hours, depending on the thickness of the glue and paint layers.
- Optional: After drying, you can spray a sealant to preserve the artwork longer.
How to Use or Play With DIY Flowers Salt Painting
Once the paintings are complete, children can enjoy their unique artworks in various ways. Hang the paintings around the house as decorations, or use them for imaginative play by creating stories around each flower. Educators can incorporate lessons on plants and colors, or children can use their salt paintings for coloring exercises by matching colors and discussing the blending effects they see. Encourage kids to share their creations with family and friends, fostering a sense of pride and accomplishment.
How to Store or Reuse DIY Flowers Salt Painting
If treated carefully, DIY Flowers Salt Painting can last for months. Store the paintings flat in a dry area, avoiding direct sunlight that may fade the colors. It’s advisable to use a large envelope or a suitable box to protect the artwork from bending or breaking. Reuse the paintings for art projects or as decorative pieces for gift wrapping or crafting.
Tips to Make DIY Flowers Salt Painting Successful
- Choose the Right Paper: Use thicker watercolor paper to prevent warping from the glue and paint.
- Supervise During Mixing: Keep an eye on children when mixing the watercolors to ensure they don’t spill.
- Handle with Care: After completion, remind kids to be gentle when moving or displaying their artwork.
- Color Exploration: Encourage kids to experiment with various color combinations and observe the results.
- Cleanup: Prepare a wet rag or paper towels on hand for easy clean-up right after the activity.
What to Avoid When Making or Using DIY Flowers Salt Painting
To ensure the best experience, avoid using regular printer paper, as it may ripple and tear. Also, don’t skip the drying time; rushing this step can lead to smudged paint and ruined designs. It’s best to stick to washable materials for easy cleanup and steer clear of glue that can be overly runny or not strong enough, as this affects how well the salt adheres.
Possible Variations
There are numerous creative twists to DIY Flowers Salt Painting! Change the theme by using different shapes or scenes, such as seasonal themes (like autumn leaves or holiday decorations). You could also swap the watercolors for food coloring for more vibrant hues, or try creating group projects to foster teamwork among classmates. For younger children, simplify the designs by sticking to basic shapes and offering larger brushes for easier handling.
FAQs
1. What is the ideal age range for doing DIY Flowers Salt Painting? This activity is suited for children ages 4 and up. Younger kids can enjoy watching the process, while older kids can take the lead in creating their own designs. Adjust guidance based on age, provide more hands-on help for younger children and let older kids explore their creativity independently.
2. What if I don’t have all the materials? If you’re missing any materials, don’t worry! You can substitute salt with sugar for a similar effect or use a different type of glue. If you lack watercolor paints, food coloring mixed with water can work just as well. Just remember to adjust the activity based on the materials you do have, keeping the spirit of the project alive.
3. How do I clean up the mess? Cleaning up after the activity can seem daunting, but with the right approach, it’s manageable. Use a dry cloth to brush off excess salt before any wet cleanup. If salt spills on the table, a damp cloth will work well. For the artwork itself, ensure the surface is flat while it dries to avoid transferring paint or salt onto other areas.
Conclusion
DIY Flowers Salt Painting is a wonderfully engaging activity that blends art, science, and sensory exploration in a fun way. I encourage you to try this activity with your children or students; they will love the vibrant results and the chance to express their creativity. Don’t forget to share your delightful findings with friends and revisit this project during future arts-and-crafts sessions!
DIY Flowers Salt Painting
Ingredients
Materials Needed
- 1 bottle White school glue Clear drying preferred
- 1 cup Table salt Regular table salt works best
- 1 set Watercolor paints (washable) Use vibrant colors
- 1 brush A paintbrush (preferably a wide one) For easier application of watercolor
- 1 sheet Thick paper or watercolor paper For best results
- 1 tray Plastic tray To help manage cleanup
- 1 bowl A small bowl For mixing watercolor paint
- 1 spoon A spoon or stirring stick For mixing paints
- optional Food coloring For added color variations
Method
Preparation
- Prepare your workspace. Cover the table with newspaper or a plastic tablecloth.
- Draw or outline your desired flower shapes on the thick paper using white school glue.
Salt Application
- While the glue is still wet, sprinkle the table salt generously over the glued areas.
- Let the glue and salt sit for a few minutes to dry slightly.
Color Mixing and Painting
- In a small bowl, mix water with watercolor paints until the colors are vibrant.
- Using the paintbrush, carefully drop the watercolor onto the salt-coated areas and observe.
Drying
- Allow the artwork to dry completely, which may take a few hours.
- Optional: After drying, you can spray a sealant to preserve your artwork.
Notes
Encourage kids to explore different colors and shapes. Supervise during mixing to prevent spills. Use thicker watercolor paper to prevent warping.

